Thursday, July 31, 2014

Sally Hansen Lava

Self-purchased


Sally Hansen Lava is a multichrome that shifts magenta, orange, and yellow. I love how prominent the shift is. It's sooo fiery and gorgeous! I am appalled that I waited so long to wear it! (Much thanks to my friend, Millie, for persuading me to wear it!) This little one is definitely back-up worthy. I used 3 coats, but I'm not sure if I even needed that third coat.  Lava was super reflective so I couldn't tell if I had any patches or not on the second coat, but it's always better to be safe than sorry. Plus, the third coat intensified the shift. ;) The formula was wonderful as it was easy to apply and control. Honestly, there's nothing bad to say about this polish. It dried with a nice shine, but I still used top coat.

Thanks for looking! See you on the other side of the day!

Michelle

Tuesday, July 29, 2014

Nayll Customized Polishes: Chihiro + Neko-chan

Self-purchased

Today, I have two polishes from Nayll that I customized! Nayll is a new indie brand that primarily focuses on customized polishes. You can choose to make shimmer or glitter polishes. With glitter polishes, you can choose a clear or colored-jelly base. If customized polishes aren't your style, then Nayll also offers pre-made polishes! I chose to customize two clear-based glitter polishes. I found that prices were reasonable and comparable to the average indie polish.


Chihiro has white, pale pink, springy green, and pale lemon dot glitter in a clear base. I was inspired by the star candies that Chihiro gave the susuwatari ("soot gremlins") in the animated film, Spirited Away. Unfortunately, there weren't star glitters that came in the colors I wanted so I settled for dot glitters. (Because they are just as awesome in my book!) I dabbed on 1 coat over Sephora by OPI Havana Dreams. The formula was not the greatest. There was a bit too much clear base for my liking and, when I dabbed the glitter on and moved it around, the polish became slightly thick and stringy. Dabbing also created a few bubbles. I wished there were more green and white dot glitter since they were pretty sparse. However, I am quite happy with how my creation came out! Next time, I'll use the sponging method to apply Chihiro. It dried slightly bumpy because of the larger green and white dot glitter so I used top coat to smooth it out.


Neko-chan has holographic red hearts and light blue and pale lemon dot glitter in a clear base. I was inspired by Hello Kitty, who is basically one of Japan's mascots. (Almost every city in Japan has its own Hello Kitty mascot, if I remember correctly.) In Japanese, "Neko" means "cat" while "-chan" is a term of endearment that's attached to the end of names. I dabbed 1 coat over Zoya Purity. The formula was very similar to Chihiro's, but it didn't bubble or become stringy. Again, I did have to dab on and move around the glitter. There was a lot of the lemon dot glitter... I wished there were more blue dot and red heart glitters. But especially the heart glitter since it was supposed to be the highlight of this polish. :( I had a lot of trouble fishing them out - putting the bottle upside down didn't help. I should have used a darker shade of yellow because I don't like the look of the pale lemon glitter in this mix. Neko-chan was a "my bad". :( Next time, I'll also use the sponging method to apply Neko-chan. It dried a bit bumpy because of the larger glitters so I used top coat to smooth it out.

Thanks for looking! See you on the other side of the day!

Michelle

Saturday, July 26, 2014

El Jardín

El jardín: (Spanish) noun. garden

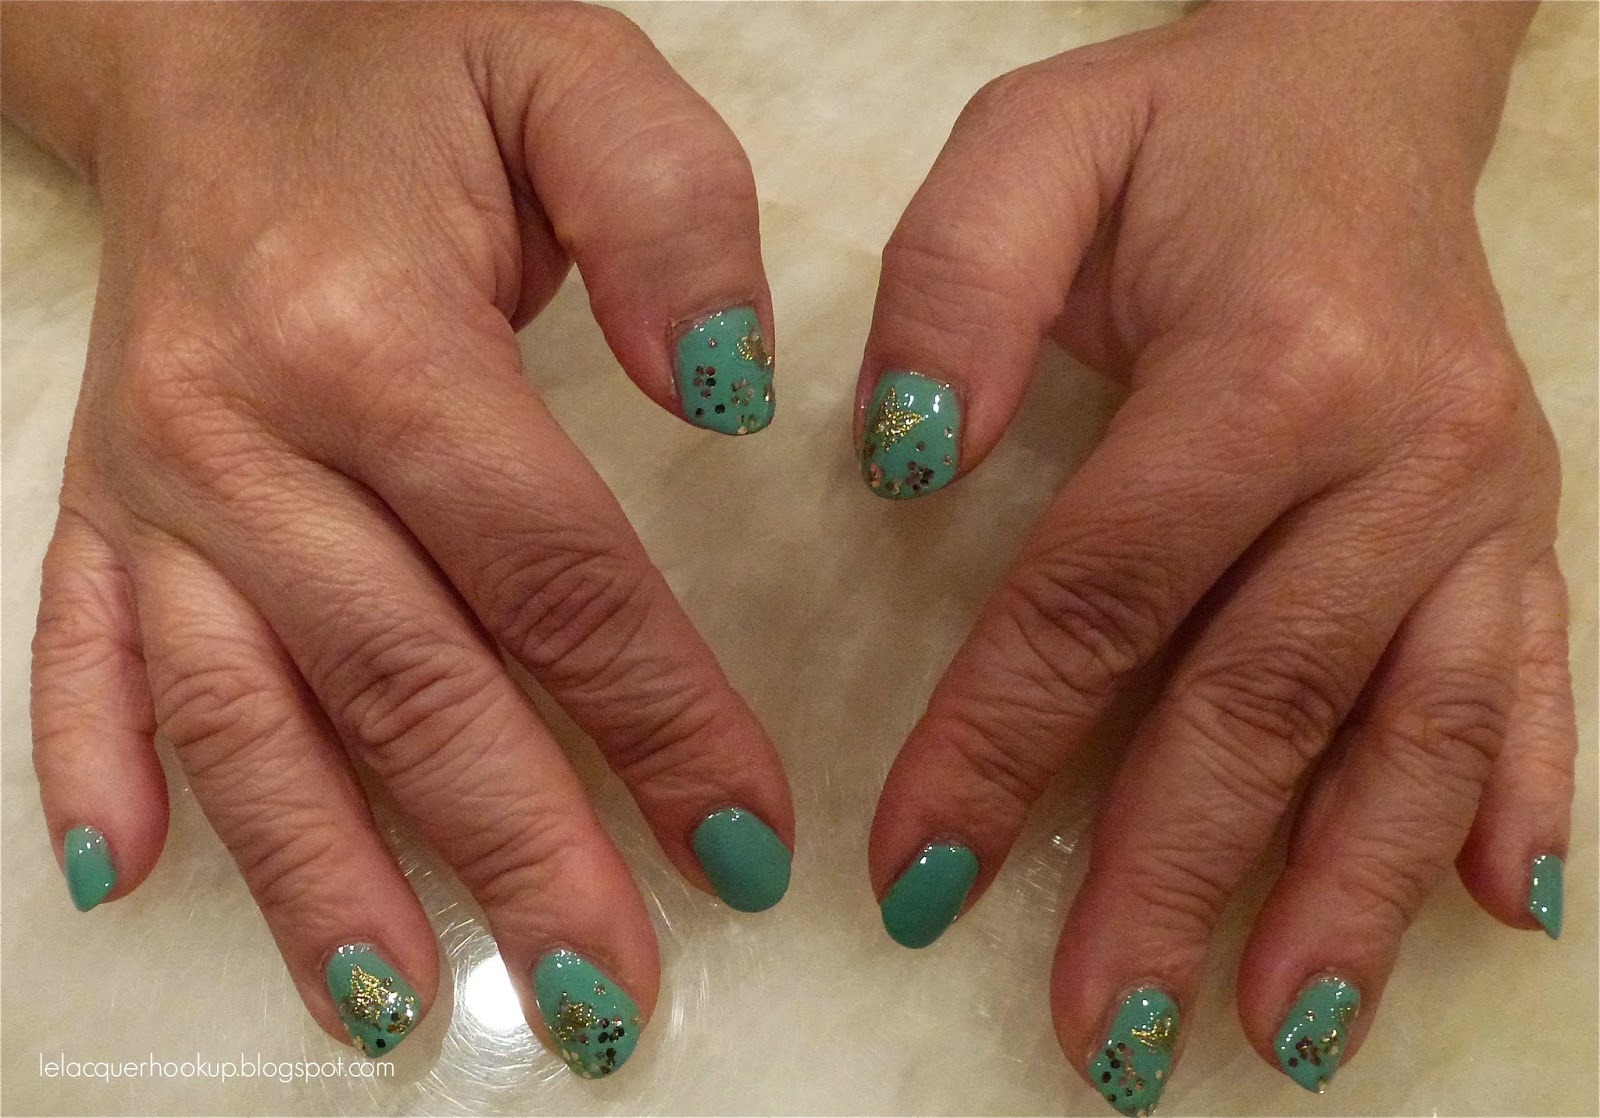
Today, I have two manis - counterparts to each other- to show you guys! :) My grandma and mom went on a short trip with two other relatives a while back. I thought it would be cute to give them matching manis.


For my grandma's nails, I used OPI Kiss Me on My Tulips as the base. I used JOBY gold butterfly nail stickers from Overall Beauty and arranged the gold glitter from Milani Gold into flowers using a small dotting tool. (Please excuse the tip wear as she cooks and does a lot of housework.)


For my mom's nails, I used Essie Turquoise & Caicos for the base and the same stickers and glitter for the design.

Thanks for looking! See you on the other side of the day!

Michelle

Thursday, July 24, 2014

Sephora by OPI Havana Dreams

Self-purchased


Sephora by OPI Havana Dreams is a pale sky blue crelly that verges on being a pastel. I used 4 coats, finishing with a thick fourth coat. I think you can get away with 3 thick coats though. The formula was sheer and thin, but surprisingly easy to control. Generally, polishes with this kind of formula are runny. It didn't level that well, but that can be remedied with a good top coat. It dried shiny so I didn't used top coat. The Sephora by OPI line was discontinued several months ago, but I'm sure you can still find its polishes on blog sales and ebay!

Thanks for looking! See you on the other side of the day!

Michelle

Tuesday, July 22, 2014

Cult Nails Feedback

Self-purchased


Cult Nails Feedback is a combination of gold and warm iridescent shards. Feedback is really beautiful! I have a feeling it will be amazing over white because my nails will look like opals! I dabbed on 1 coat over Color Club Wicker Park and had to move the shards around for even distribution. The formula was good. The clear base wasn't in excess so dabbing was easy. I also had no trouble manipulating the shards. They are quite chunky and large, but will behave and lie flatly on the nail if you lightly tap them down. Setting the bottle upside-down for a little bit really helped get more shards onto the brush. If you get enough shards on the brush, then you can apply Feedback normally, instead of dabbing. It dried bumpy so I used top coat to smooth it out.

Thanks for looking! See you on the other side of the day!

Michelle

Saturday, July 19, 2014

Daiso Gradient Nails Duo in Cherry Pink and Lamé Pink

Self-purchased

I probably professed my love for Daiso on this blog before, but I'll say it again... I LOVE DAISO. I came across some gradient nail duos on one of my many trips, and I just had to try them out! (How can I say no to $1.50 duo packs with good-quality polishes?) I picked up 3 over the course of my trips, but today I'll only show the duo in Cherry Pink and Lamé Pink. The directions were on the packaging, which I no longer have, but I'm able to retrieve them from memory.

1. Paint the base color and let it dry.
2. Paint the glitter in a half-moon shape, covering the top 1/2 of the nail.
3. Paint the glitter in a half-moon shape again, but this time covering the top 1/3 of the nail.

I'm super excited to be able to try out a gradient nails set because they seem to be quite popular in Asia (i.e. the Etude House Juicy Cocktail Gradation Nail sets). Let's get cracking!


Cherry Pink (base color) is actually an extremely sheer peachy pink packed with gold shimmer. The base color pretty much disappeared on the nail, leaving a trail of the gold shimmer. It's very pretty and perfect for these gradient packs! I used 1 coat as per instructions. The formula was thin and runny; it kept wanting to pool at the cuticles. It dried shiny.

Lamé Pink (glitter) is a sheer cherry red with pretty holographic silver glitter. I was scared the red base would overpower the gradient, but, as you can see, it only gave a pinkish tint once on the nail. The formula was a little thick, but wasn't too bad. It was easy to control. It dried shiny and a bit gritty because of the glitter. With top coat.

Overall, I am really impressed! The gradient came out pretty well and the directions were easy to follow. (They were in Japanese, but pictures were also provided.) I can't wait to try my other 2 sets. :D

Thanks for looking! See you on the other side of the day!

Michelle
Thursday, July 17, 2014

Rimmel Candyfloss Cutie + Revlon Starry Pink

Self-purchased


Rimmel Candyfloss Cutie (index and middle fingers) is a warm, rosy pink frosty texture. For some reason, the polish reminds me of cherry blossoms! I used 4 coats in case it appeared patchy in swatches, but it's actually opaque in 3 coats. The formula was good, but the big brush make it a little tricky to apply. The textured finish became apparent almost as soon as I finished each coat. It dried quickly. I didn't use top coat in order to preserve the textured finish.

Revlon Starry Pink (ring and pinky fingers) is a darling pale pink crelly packed with silver glitter. It's super princess-like! It has since become a part of Revlon's core line and been renamed "Popular". I used 3 coats, finishing with a thick third coat. It would have been better if I had done 2 medium-thick coats. Fail, lol. The formula was good, though I had to dab on the silver hexes. Alternatively, I could have set Starry Pink upside-down before applying it in order to get the hexes out. It dried shiny. No top coat.

Thanks for looking! See you on the other side of the day!

Michelle

Tuesday, July 15, 2014

Hare Polish Bisbee 2.0 + SpaRitual Ebb & Flow

Self-purchased


Hare Polish Bisbee 2.0 (index and middle fingers) has gold shimmer and hex and square glitter in a dusty teal crelly base. I used 3 coats. The formula was good, though a tad sheer. I had to dab a bit to get the bigger glitters, but I didn't have any problems doing so. I recommend setting Bisbee 2.0 upside-down in order to get a lot of glitter onto the brush. It dried satin so I used top coat. I purchased Bisbee 2.0 from Hare Polish's Etsy store.

SpaRitual Ebb & Flow (ring and pinky fingers) is a gorgeous turquoise creme. I used 2 coats. It's insanely pigmented so I think you can get away with 1 thick coat. It might stain because it's so pigmented so I recommend using at least 2 coats of base coat. The formula was wonderful! SO buttery and easy to apply! I really like the thin brush, which makes the polish easy to control and is similar to Essie's. It dried shiny, but I still used top coat.

Thanks for looking! See you on the other side of the day!

Michelle

Friday, July 11, 2014

Twin Mani Post: Wet 'n Wild Hannah Pinktana + Big Announcement

Self-purchased

Today, I have another Twin Mani post with Millie, from The Nail Smith, to show you guys! We had so much fun doing the mani swap post that we decided to do another feature together. :D (Actually, there is something in the works between the two of us right now!) As it turns out, Millie and I have Blue Wants to be a Millionaire and Hannah Pinktana (respectively), which are counterparts to each other. We thought it would be a great idea to wear the two today.


Wet 'n Wild Hannah Pinktana is a sheer red-violet jelly with holographic microglitter. It was one of the very first polishes I bought so it has a special place in my heart. <3 I used 4 thin coats. The formula was okay. It was a bit thin and kept wanting to pool, but I didn't have any other trouble with it. It dried satin so I used top coat.

And the big announcement is... Millie and I have decided to embark on a new project! Every first Saturday of the month, starting in August, we will be doing a monthly twin mani post. I am ecstatic about this project because I find it motivating and great for creative release. Please look forward to this project! :)

Thanks for looking! See you on the other side of the day!

Michelle

Thursday, July 10, 2014

KBShimmer Totally Tubular + Sally Hansen Fairy Teal

Self-purchased


KBShimmer Totally Tubular (index and middle fingers) has blue, red-violet, and turquoise glitter in a teal crelly base. I used 3 coats. The formula was good, but just a tad thin. I had to dab a bit to get the bigger glitters out, but didn't have much trouble doing so. I recommend setting the polish upside-down before using it in order to get a lot of glitter on each application. It dried satin so I used top coat.

Sally Hansen Fairy Teal (ring and pinky fingers) is a dusty, deep teal creme. I used 2 coats. The formula was great! It was very pigmented and applied easily even with the big paddle brush. I think the paddle brush goes well with curved nails because I've never had problems using it. A word of caution: this one stains badly! Definitely make sure to use at least 2 coats of base coat. It dried shiny, but I still used top coat. I'm not sure if Fairy Teal is in the revamped Complete Salon Manicure line, but I think I remember seeing the same or similar color the last time I was at the drugstore.

Thanks for looking! See you on the other side of the day!

Michelle

Tuesday, July 8, 2014

China Glaze Glistening Snow + Nails Inc. Noho

Self-purchased


China Glaze Glistening Snow (index and middle fingers) is a dense, holographic silver glitter. Think of it as a full-coverage version of the beloved Fairy Dust! I used 3 coats. The formula was good and easy to control. I've had this for several months to a year now, which is when I generally find many of my China Glazes to have dried up a little. I noticed this one didn't escape the same fate when I applied it, but it's nothing some thinner can't fix! :) It dried very gritty so I used 3 coats top coat.

Nails Inc. Noho (ring and pinky fingers) is a black that produces a leather effect once it dries. The leather effect is much smoother than the texture effect. I think it'll be great for people who don't like how rough the texture effect is. I used 2 coats. The formula was amazing! It was the standard Nails Inc. formula: very pigmented, buttery, and easy to control and apply. The effect materialized soon after application. It dried quickly. I didn't use top coat in order to preserve the finish.

Thanks for looking! See you on the other side of the day!

Michelle

Saturday, July 5, 2014

El Ala

El ala: (Spanish) noun. wing

Several weeks ago, I met up with two of my closest high school friends. It was wonderful to see them both again, and I'm so happy that they are well and doing what they want to in their lives! :D They have decided to take Life by its hand and run with it into the future, the unknown.

One of my friends was able to sleepover for the night. Of course, we decided to do our nails late at night. (I need to stop doing that with my friends... Sleeping at 3 am is only good during the school year because you can squeeze in some more studying time. For science and health care!)  We both wanted to do something simple; I decided on a loose glitter gradient and polka dots while she decided on wispy gold feather stamps.


For my look, I was inspired by the Korean nail art I saw on instagram. A lot of the manis were simple and refreshing, yet still cute. I used Sally Hansen Thinking of Blue (from the old Complete Salon Manicure line) as my base and Wet 'n Wild French White Creme (or was it Zoya Purity?) and my second smallest dotting tool for the polka dots. I applied a coat of top coat and then dumped a little of the loose, holographic star glitter that was from Daiso Japan onto my nails. The arms liked to stick out and kept scratching me, but the stars were so pretty!


My friend wanted to try out stamping so I had to practice on scratch paper before doing her nails. (Stamping is actually still a novel contraption even to me!) She ended up redoing her nails and stamping the feathers herself the next day, but over a peachy nude base. (Good, I didn't want her to go out with that horrible handiwork of mine!) However, I only have pictures of her first mani. For this look, I also used Sally Hansen Thinking of Blue for the base. I heard metallics worked well with stamping (which is true by the way) so I used Essie Good as Gold for the feathers. ...I think I should stamp more often so I can become a stamping master (much like Ash becoming a Pokemon master).

I really enjoyed the short hang-out with my good high school friends! Hopefully, we have time in our schedules to meet up again. :)

Thanks for looking! See you on the other side of the day!

Michelle